Identity Management Evaluation
TODO: move and reorganize initial text to trust management category
The identity management is based on the paradigm of a multi-IdP multi-service architecture, stating that we have interoperability between services. In legacy communication services (i.e. Telco), trust is considered as a basis because the service provider is also identity provider, and interconnection between networks are presumed secure. Here, the game is different because a user should trust his browser (as trusted computing base), the IdP he has chosen, and probably his service provider. But there is no way to ensure that the user you want to reach uses a trustful service. For example, if Bob is using service A, he wants to reach Alice on service B, if there is an interconnection between A and B, how can bob be sure that Alice is the right person to reach? To solve this issue, the W3C and IETF specify the IdP-Proxy mechanism. It allows Bob to deliver an identity assertion, which can be verifiable by the other party. Within the context of the reTHINK project these actions and services are performed by Hyperties running on the Runtime Core. The Hyperties are identified by long and complex strings derived from Hyperty instances URLs, further needing to have a user identity associated to it. With this association becoming publicly registered, it is possible to discover the user Hyperty instance by searching for a known user identity. For example, if Alice install a Hyperty and uses her identity obtained from an IdP, for example the Google email address ”alice@gmail.com” to associate with the Hyperty, Bob, when searching for this email, receives the Hyperty instance of Alice, which allows him to initiate a conversation with Alice. Because Bob also needs to register his Hyperty with an identity, when Alice receives the call, she can identify who is calling her. Note that, the user identity can be obtained from a service provider other than the CSP and because of that, IdPs are a separate service from CSPs. The identity is verified by validating the Public key contained within the Identity Token (obtained using the validate assertion service from the corresponding IdP) and them challenging the clamming party (e.g Bob) to prove the possession of the associated Private key. This validation operation is performed by the IdM not by the Hyperty itself. Thus, this procedure does not the behavior of the Hyperty, nor thus this need to know how to manage the identities. The connection between the IdM and the IdP is performed using a DTLS handshake during the WebRTC connection setup, ensuring that authenticated person is the one that has opened the peer connection. This prevent man in the middle attack from the service provider.
Use cases
The main use case the establishment of a secure communication channel between peers and assuring the identity of each one. Of course this can be generalized in the communication with objects, with some trustful authentication services. When an Hyperty connects to a service, the runtime authenticates itself towards the destination runtime using the Identity Token obtained from the selected IdP, based on the identity selected by the user. Upon a successful mutual authentication session keys are also established, which are used to establish the secure communication channel between the connecting peers. This identity selection and ID Token usage is supported by two main mechanisms. One embedded in the reThink core runtime, called IdModule and a second one called Browser extension.
Implementation
The following describes the two implemented mechanisms for identity management, the one embedded in the reThink core runtime (IdModule) and Browser extension.
IdModule
The embedded identity management mechanism is the core component responsible for the identity management and the establishment of secure channels between runtimes in reTHINK. For the interaction with the IdP an IdP-Proxy is required, providing the particular interface methods for each particular IdP. As defined by W3C and IETF this IdP-Proxy should be provided by the IdP itself. However, since this is a novel approach and the most commonly IdP do not provide IdP for JS, the IdP-Proxies can be retrieved either from the IdP (when available) or from the reTHIK catalog.
For component isolation, the user does not directly interface directly with the IdModule. The user selection and management within the embedded identity management is performed via the Identity Management GUI, described below. Additioanlly, and to improve the user experience, the IdModule allows for the identity to be selected by the application by providing a dedicated API. The application is able to call for the creation of an Hyperty with or without selection the user to be associated. If no ID is defined, the GUI is called automatically to request the ID selection from the user, as illustrated bellow in the Identity Management GUI description.
In order to support the use of identities managed by the browser itself, the IdModule also supports a browser extension in order for the Identity Token to be obtained via the browser.
Browser extension
A second implementation of the Identity Module is based on the browser extension. It supposes that the browser is responsible to manage user identity, and uses the IdP-Proxy as a proof of authentication for the browser. Here again, as no actual IdP provides the IdP-Proxy, we have developped two implementations of the IdP-Proxy with OpenID Connect protocol. The difference of this implementation is decoupled from the core framework, and thus can be used by the application, regardless of the use of the framework or not, stating that even if no hyperty is loaded, the user is usually authenticated in the service.
This extension is callable by a single “Connect” button replacing the numerous current “XXX” Connect (Facebook, Google, twitter…).
Functional Testing Procedures
IdModule Functional Testing Procedures
The following describes Functional Testing Procedures to test the usage of the Id Module. This is accomplished using the functionalities provided by the GUI to perform the identity management inside the reTHINK runtime. This GUI enables the user to:
- Select the Identity Provider from which to login;
- Login, using the specified Identity Provider (IdP), via an IdP controlled Window that will pop-up to the user, and
- Remove an identity from the list of authenticated identities.
Identity Selection
When a user first interacts with reTHINK, an Identity selection page is displayed.
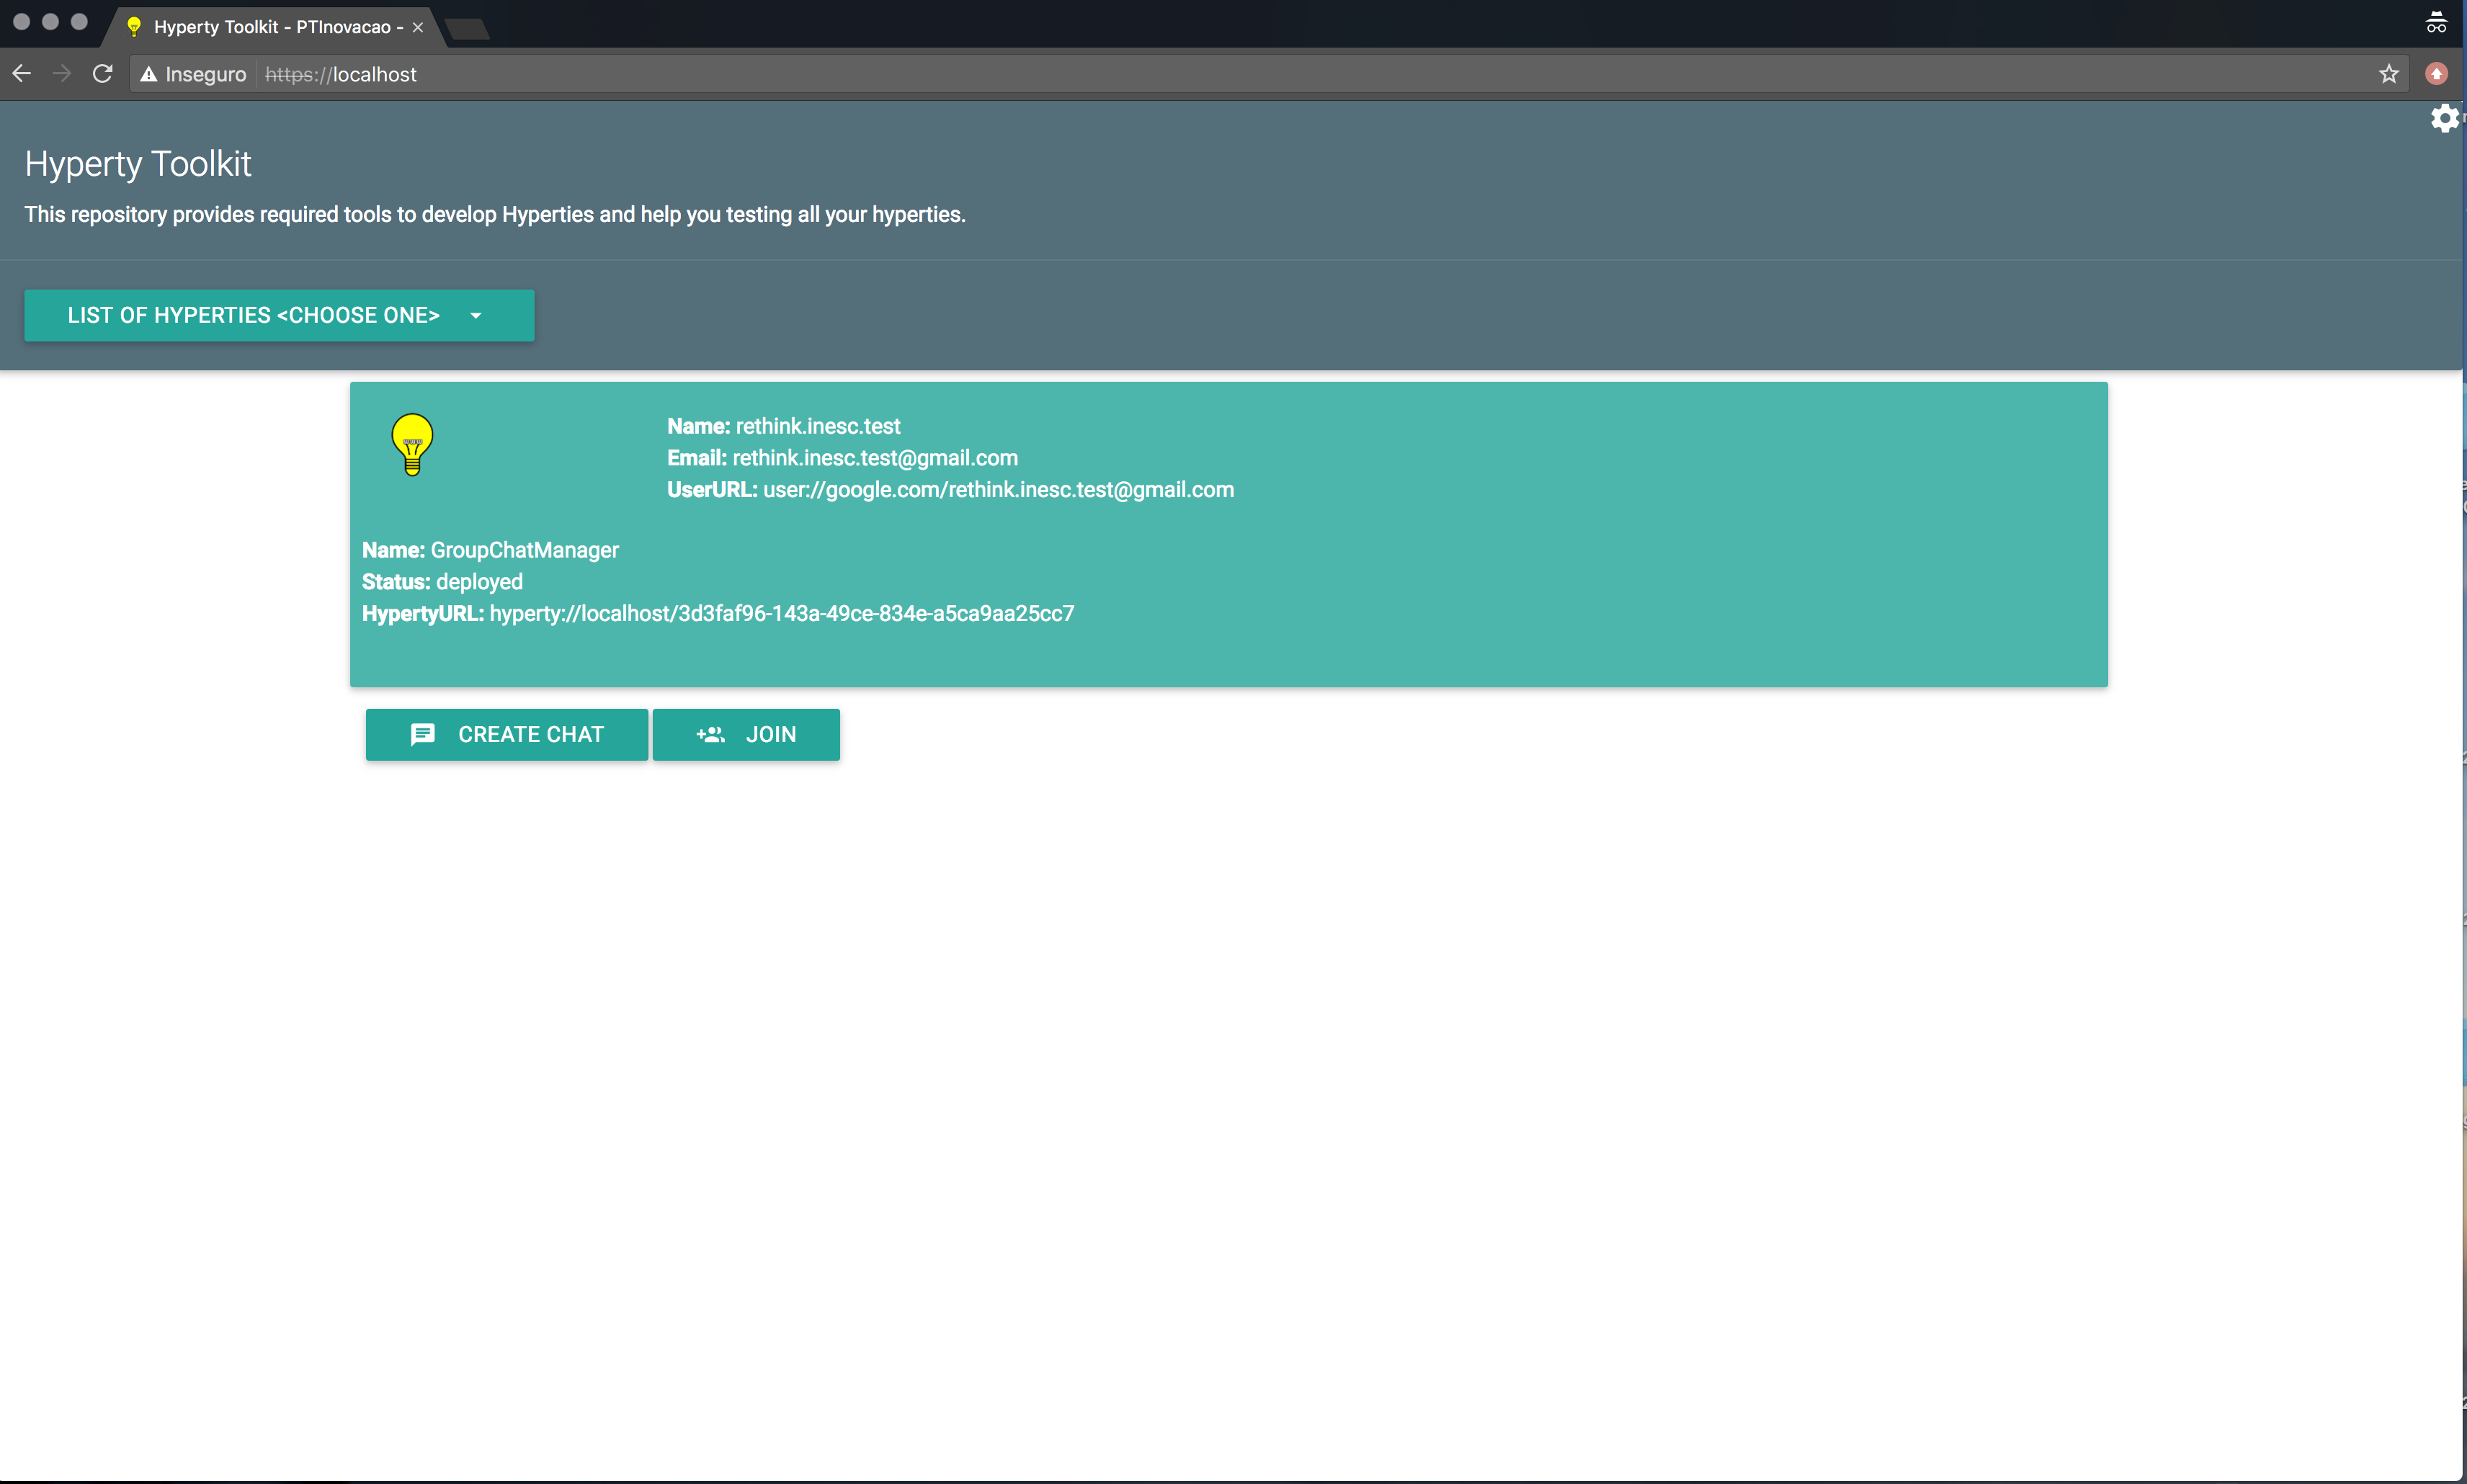
In case the Hyperty Toolkit is used (for example, the Hybroker Hyperty Toolkit shown below) the user has to select an Hyperty from the List of Hyperties.

Anytime, the user can select the small wheel icon at the right upper corner to access the Runtime Administration page that allows the user to select between the Policies GUI and Identity Management GUI, while the last automatically shows the Identity Management GUI to the user for identity selection.
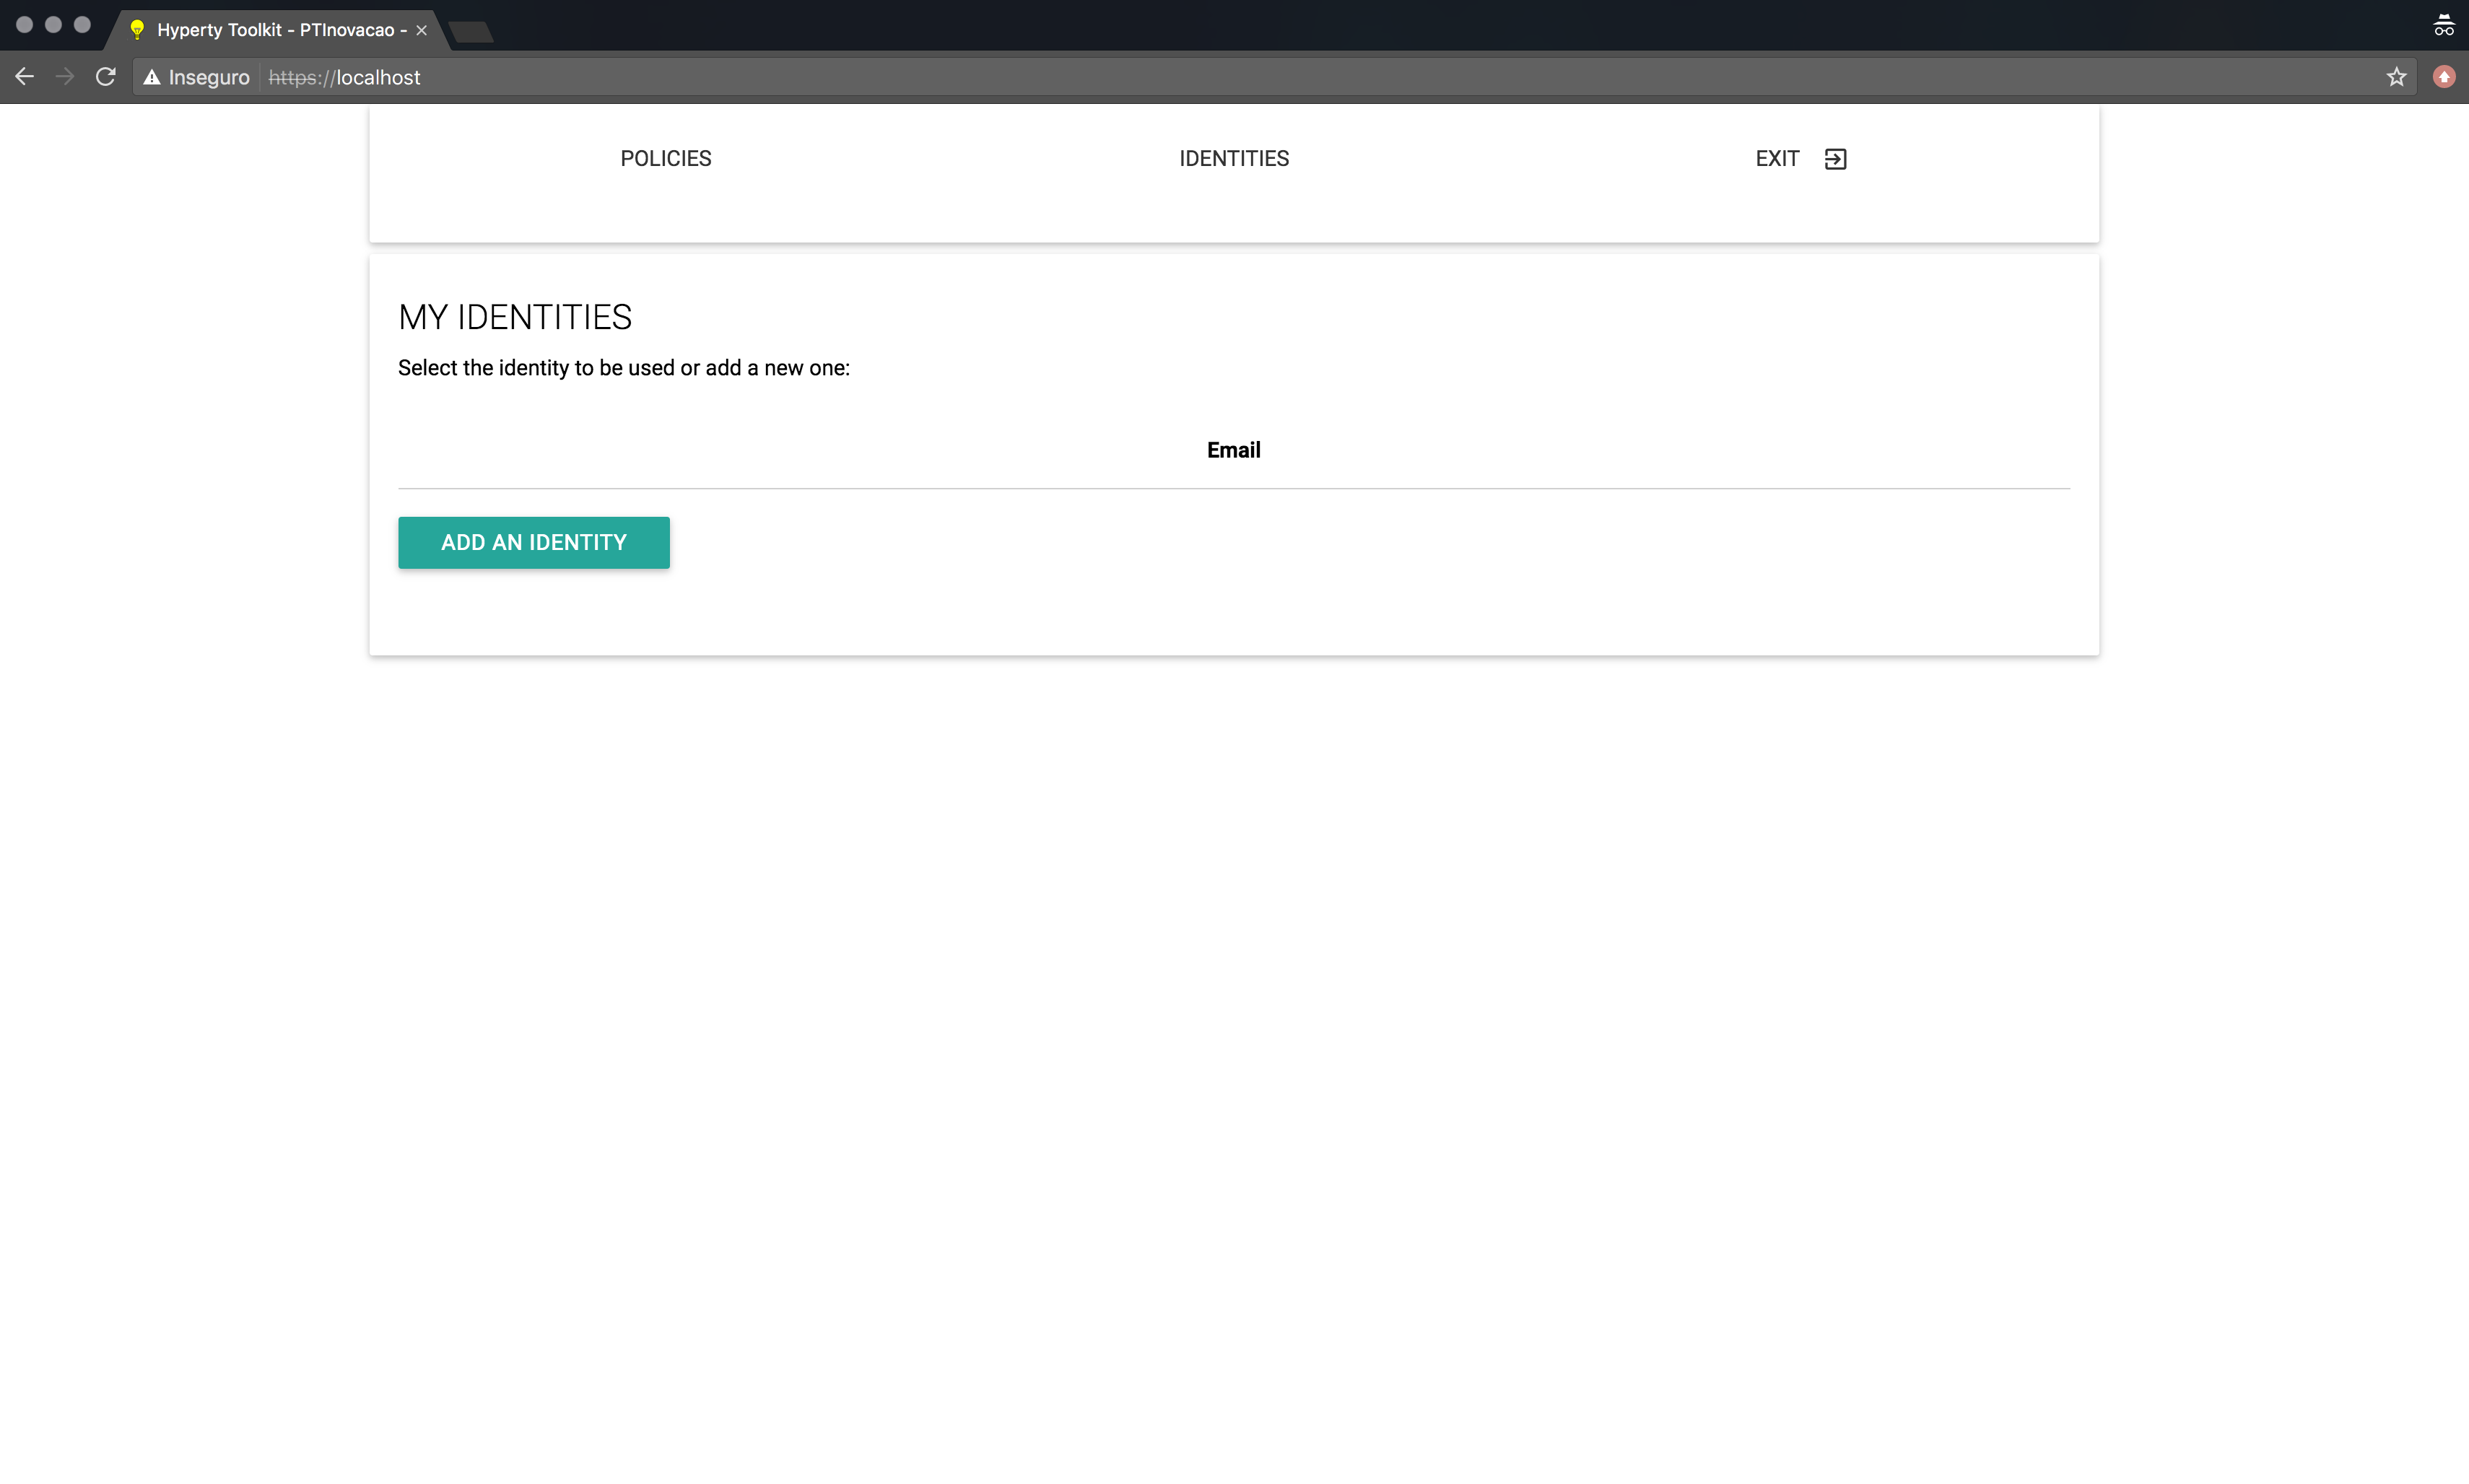
Whether the user was automatically prompted to the Identity Management GUI, or the user manually selected the Identity GUI via the small wheel icon, both interactions will show the Identities Page to the user (shown below). This page consists of a single “Add an Identity” button, which allows the user to start the identity selection and authentication process used in reTHINK.
Login in
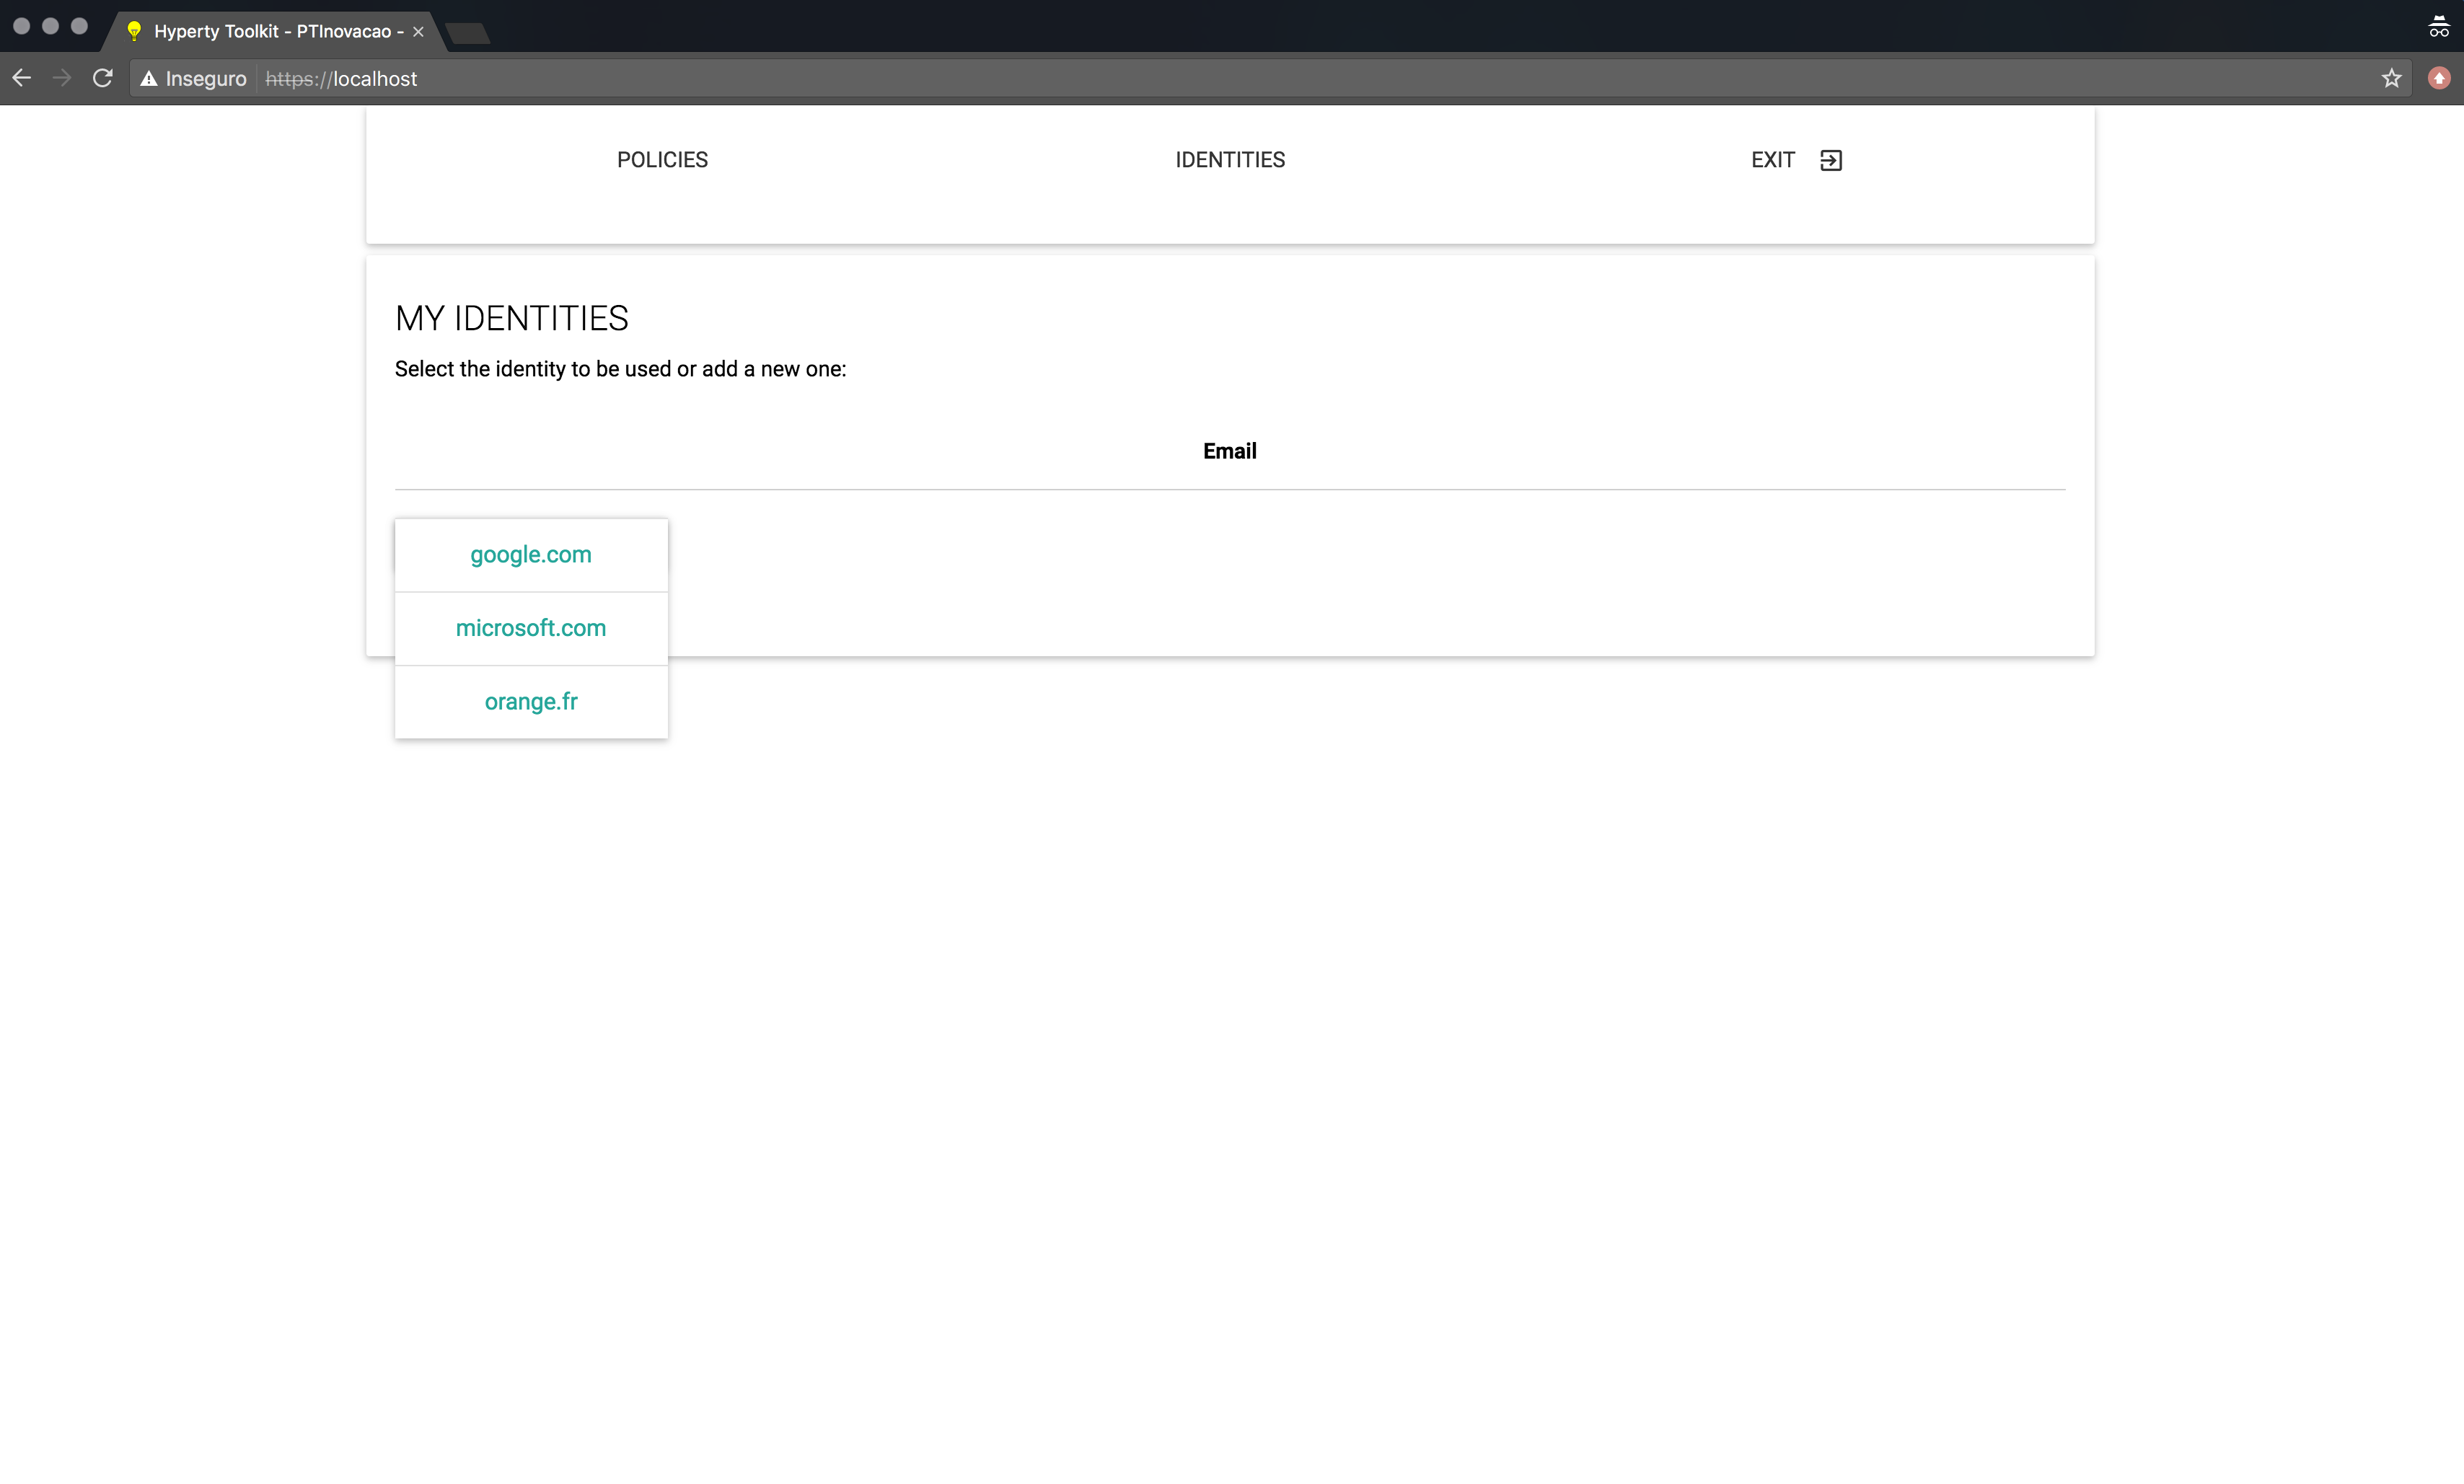
When the user clicks the “Add an Identity” button shown in the previous section, a list of available Identity Providers in shown (see bellow). The user then proceeds by selecting the IdP from which he whishes to login.
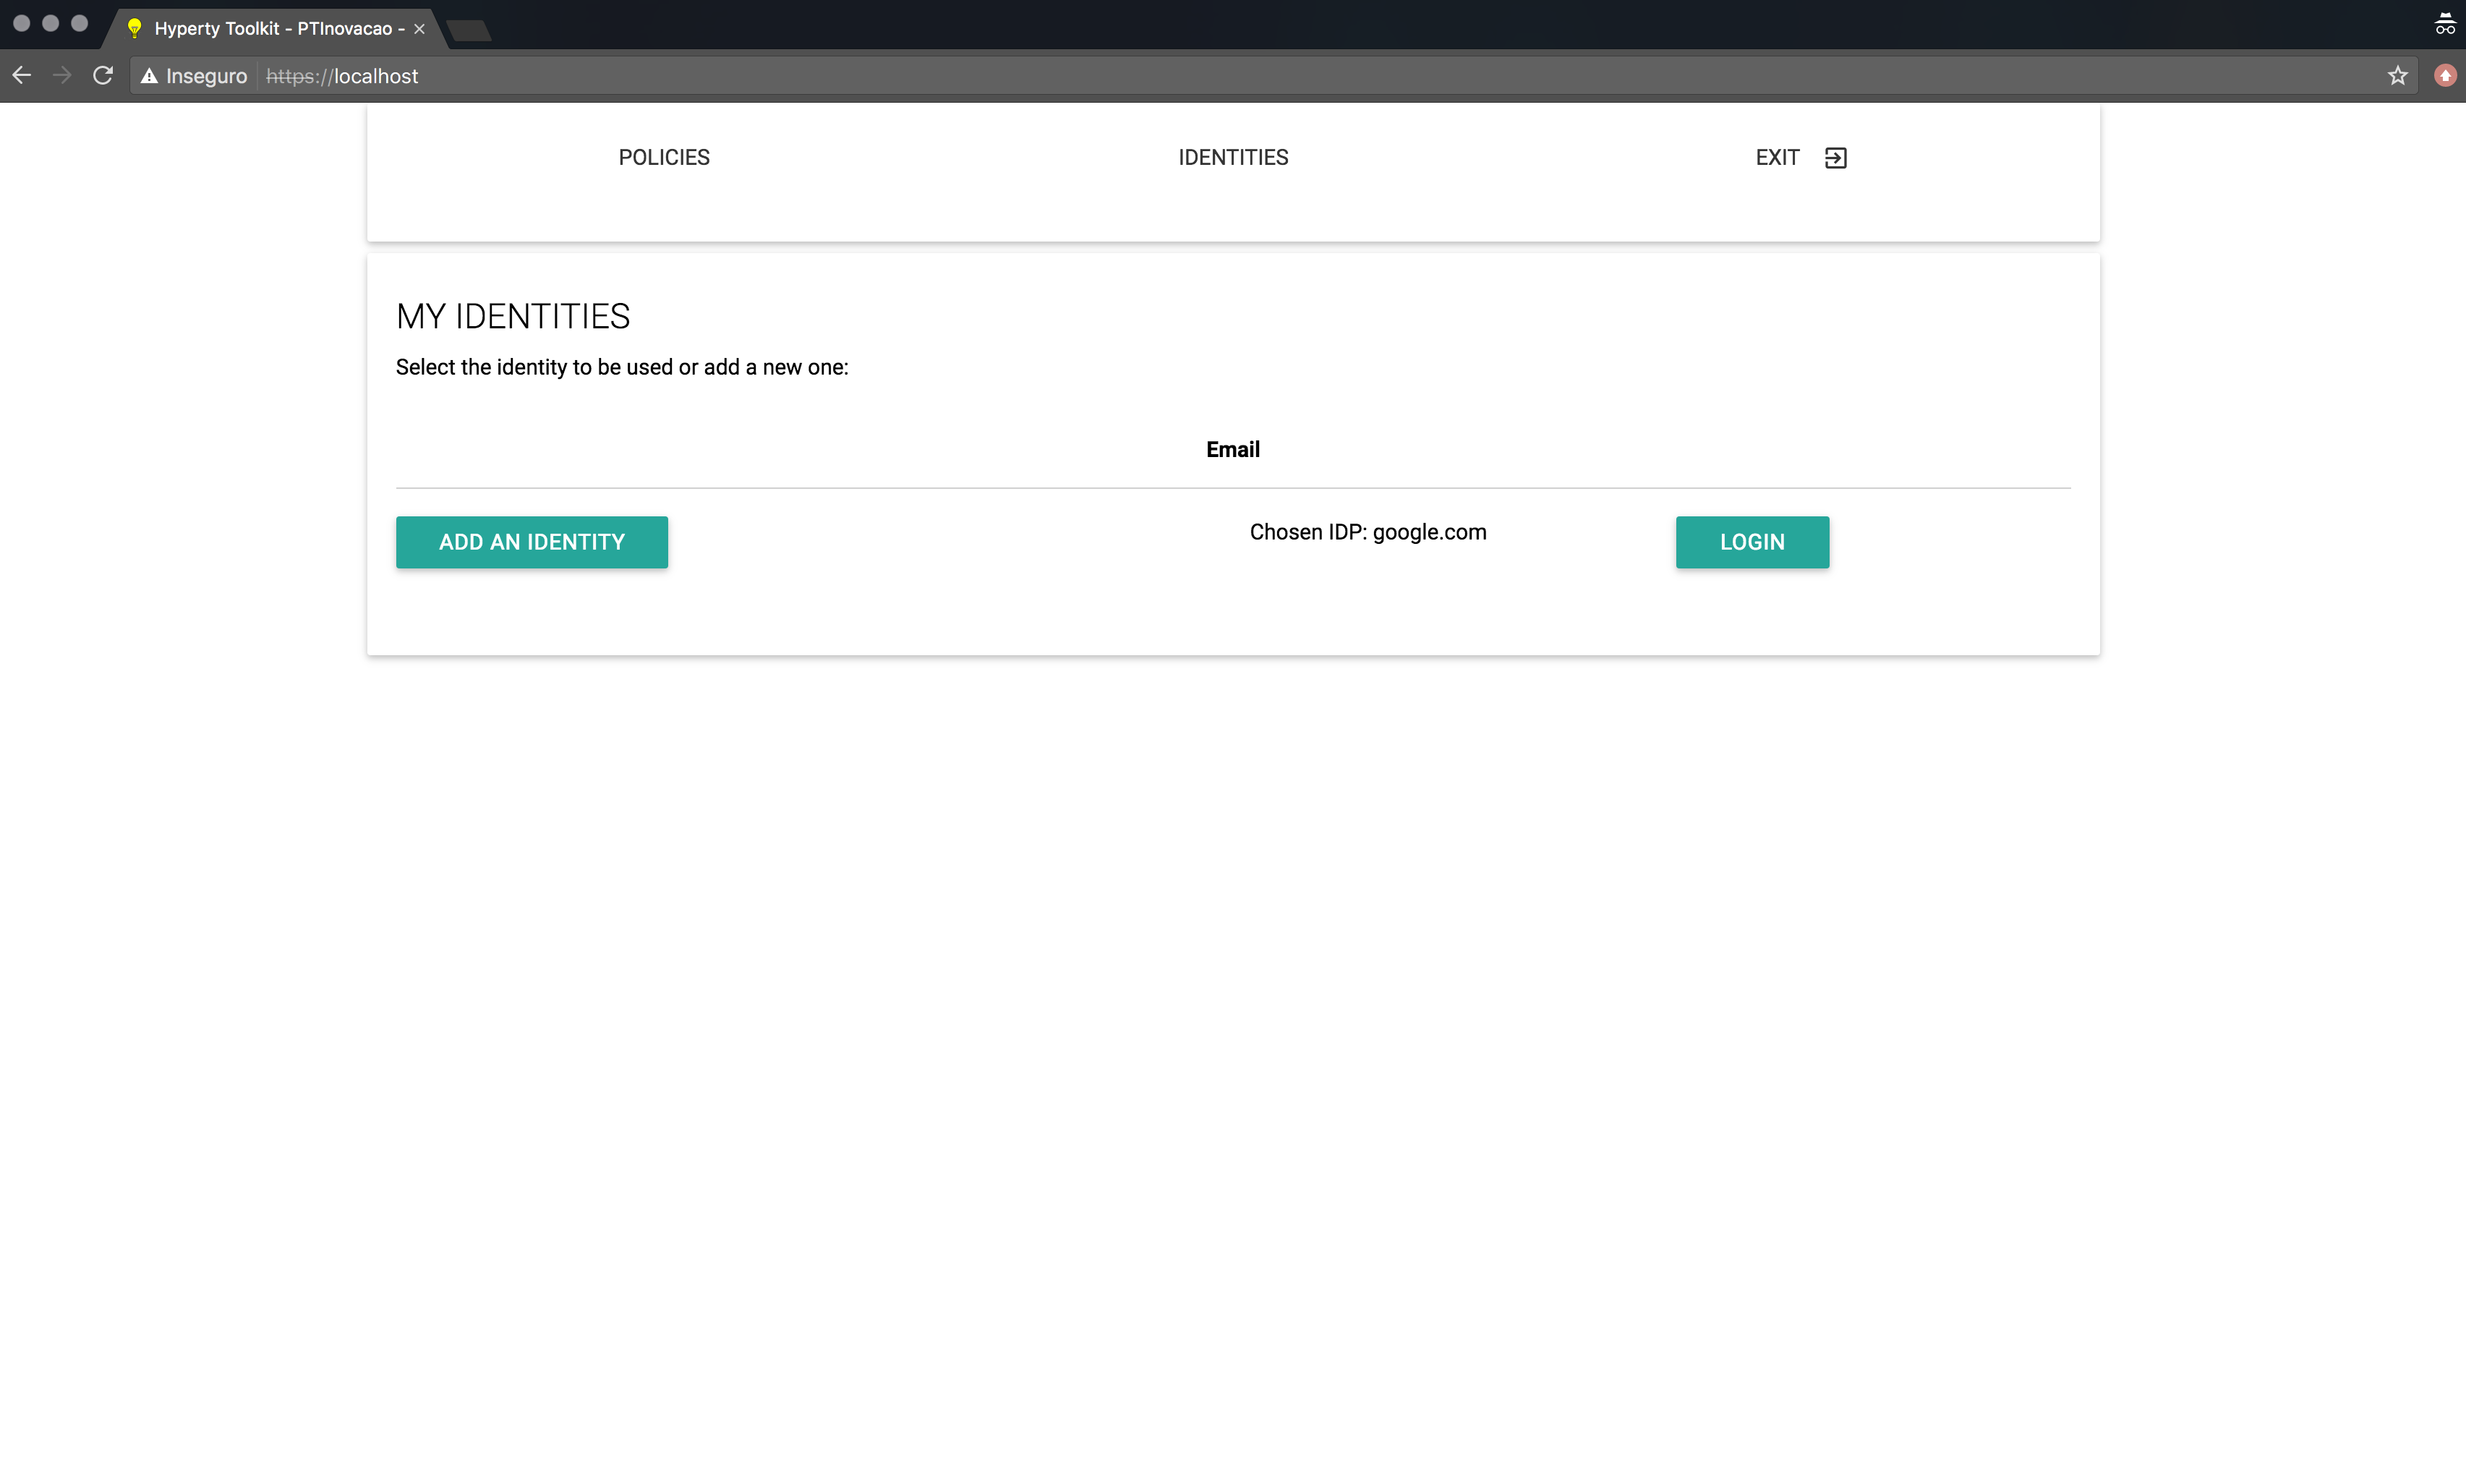
After the IdP selection is finished, the Login page is presented (see bellow). On this page, the user can select a different IdP via the “Add an Identity” button, thus overwriting the Identity Provider selected before, and the user can also proceed with the authentication process by clicking the “Login” button.
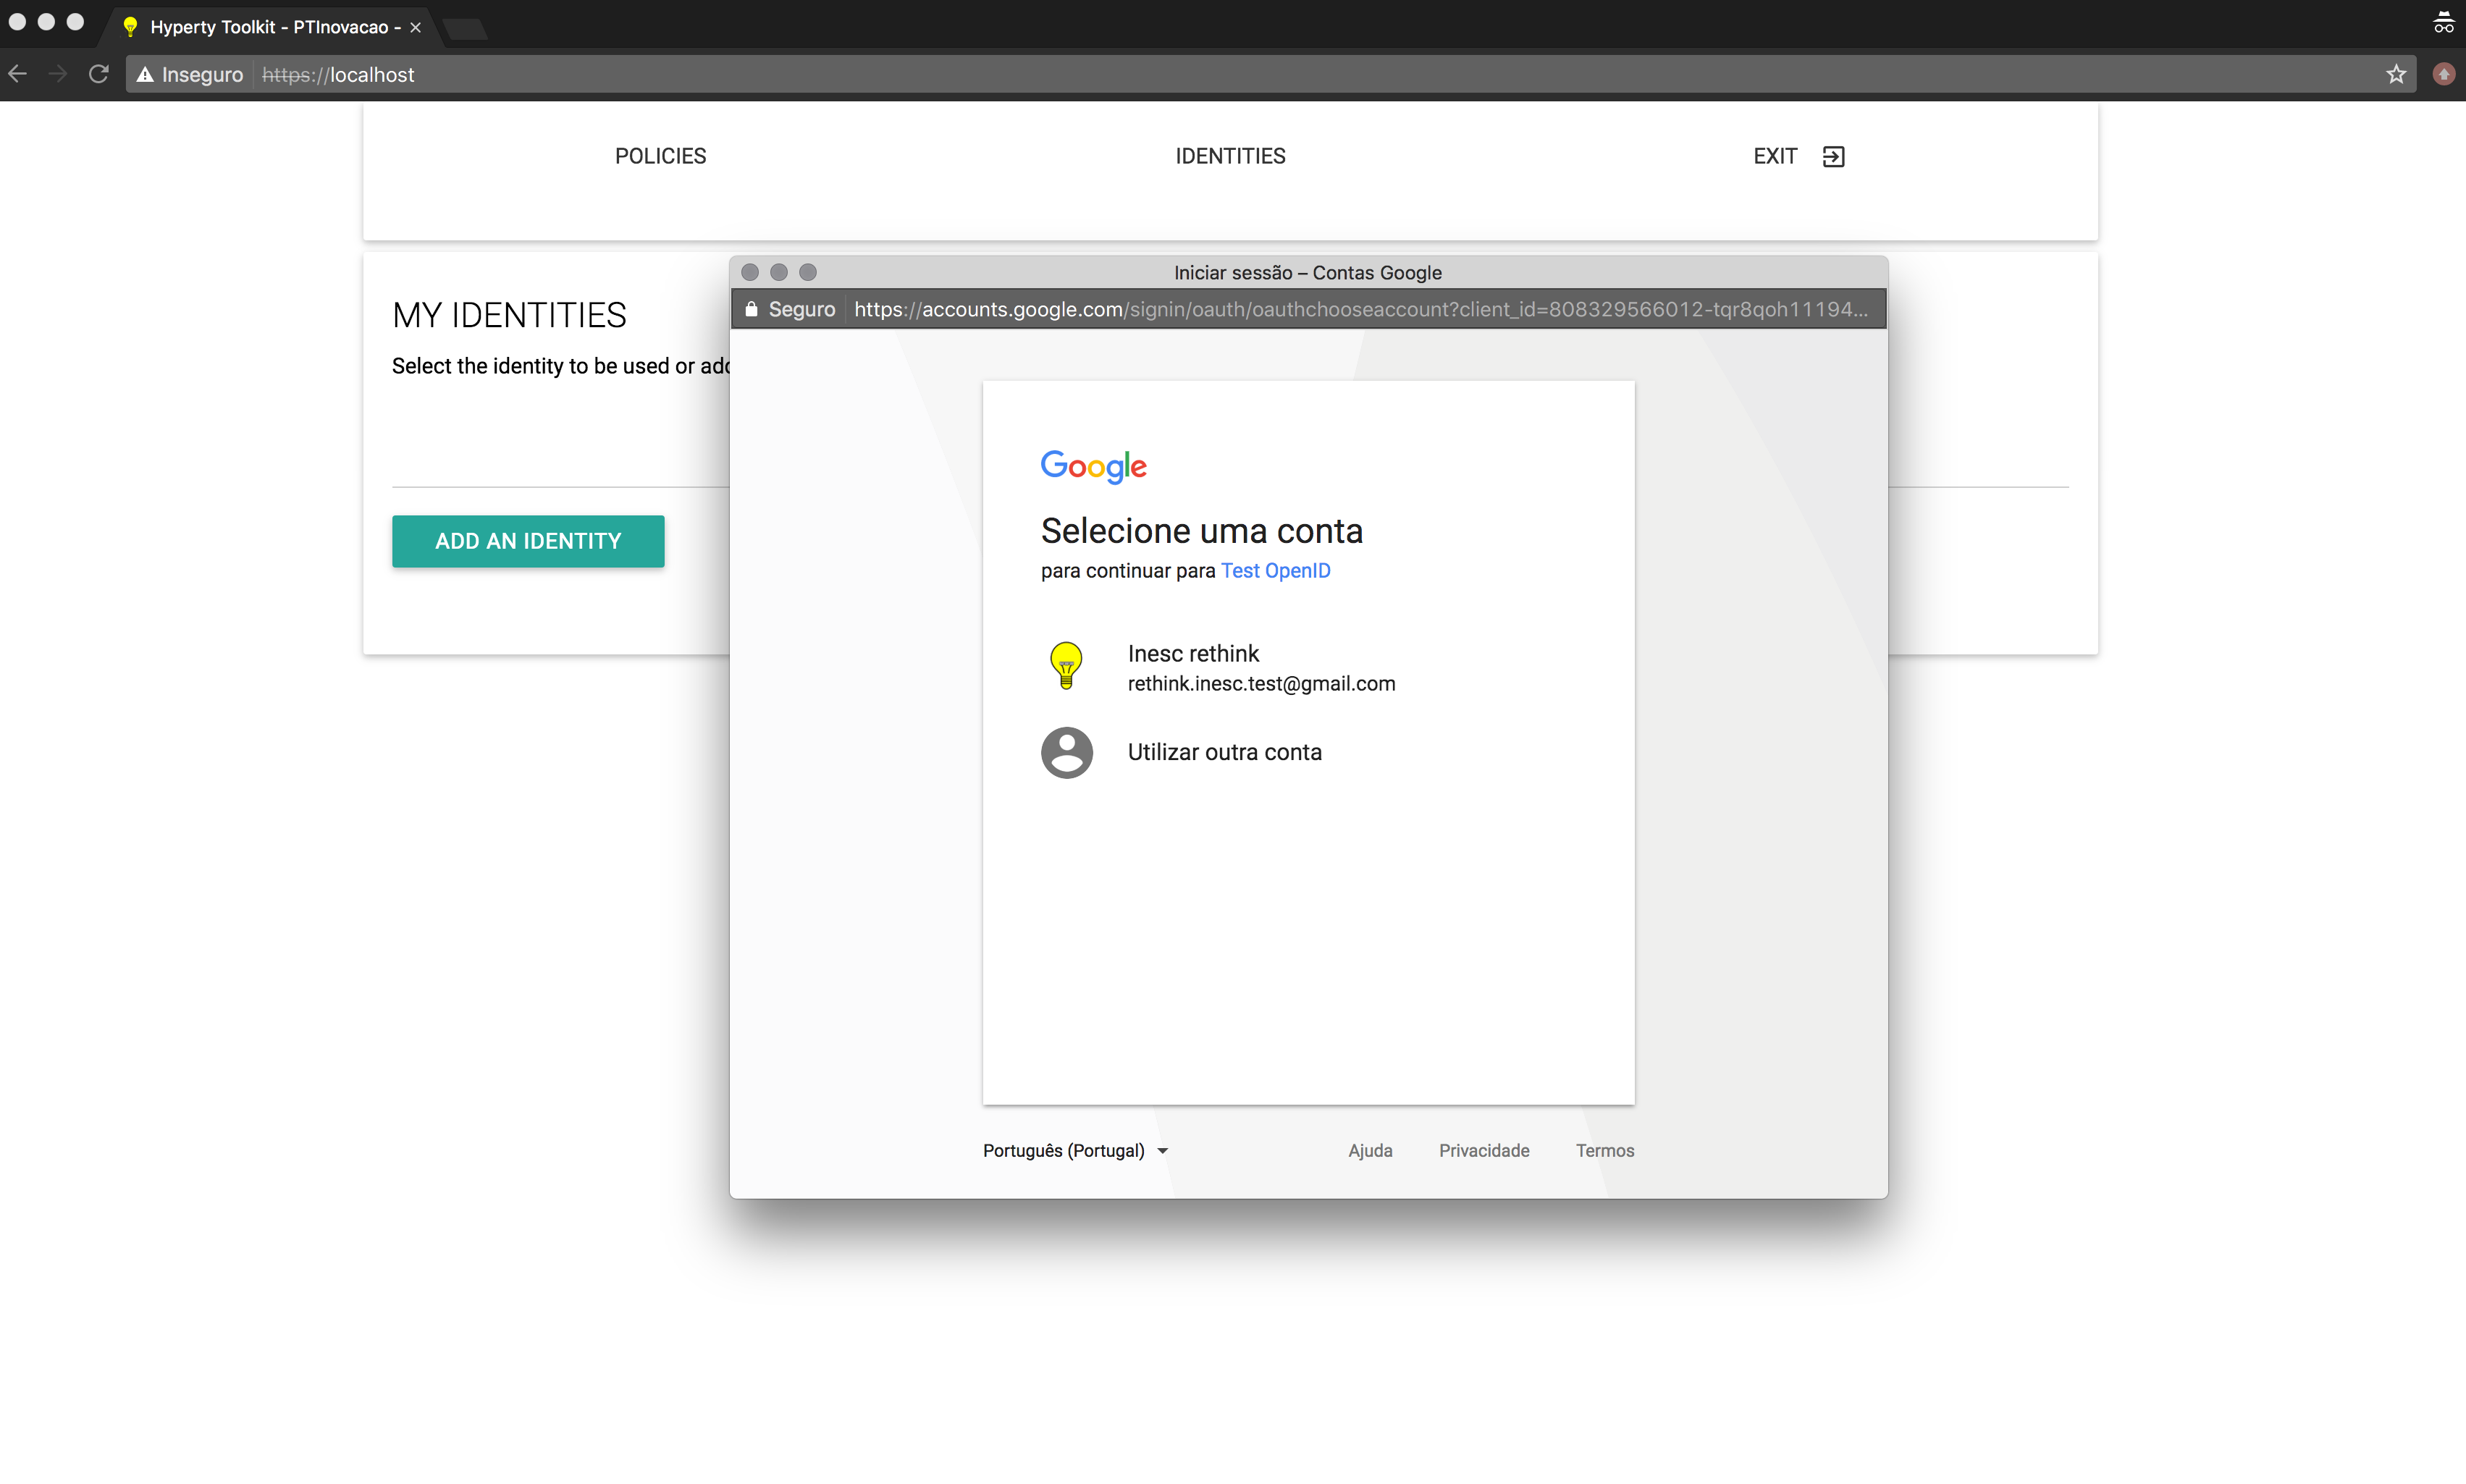
When the “Login” button is pressed, a new window, controlled by the Identity Provider (i.e. reTHINK does not control the content displayed inside this window), is shown to the user (see bellow). On this Pop-up window, the user authenticates against the selected Identity Provider using the provided login form.
After Authentication
After the authentication process in concluded, the user may be presented with one of the following pages:
-
A page corresponding to the selected Hyperty (e.g. by using the Hyperty Toolkit) or Application (seen here. This page is shown if the user was automatically redirected to the Identity Management GUI after selecting an Hyperty in step 1 (Landing Page).
-
A page containing a list of all the authentiated identities in the runtime (seen here). This page is shown if the user manually selected the Identity Management GUI in step 1 (Identity Selection);
Authenticated Identity
If the user was automatically redirected to the Identity Management GUI, after the authentication process is over, this user will be redirected to the Application page or back to the Hyperty Toolkit page (shown bellow) . This allows for the authentication process to be integrated seamlessly in the Hyperty used by the Application.
Identity Management Administration page
If the user manually selected the Identity Management GUI, then this user will be presented with a list of al authenticated identities in the runtime. Furthermore, this list also allows users to remove authenticated identities from the runtime. To remove an authenticated identity the user must select the “Remove” button associated with the identity he wishes to remove.
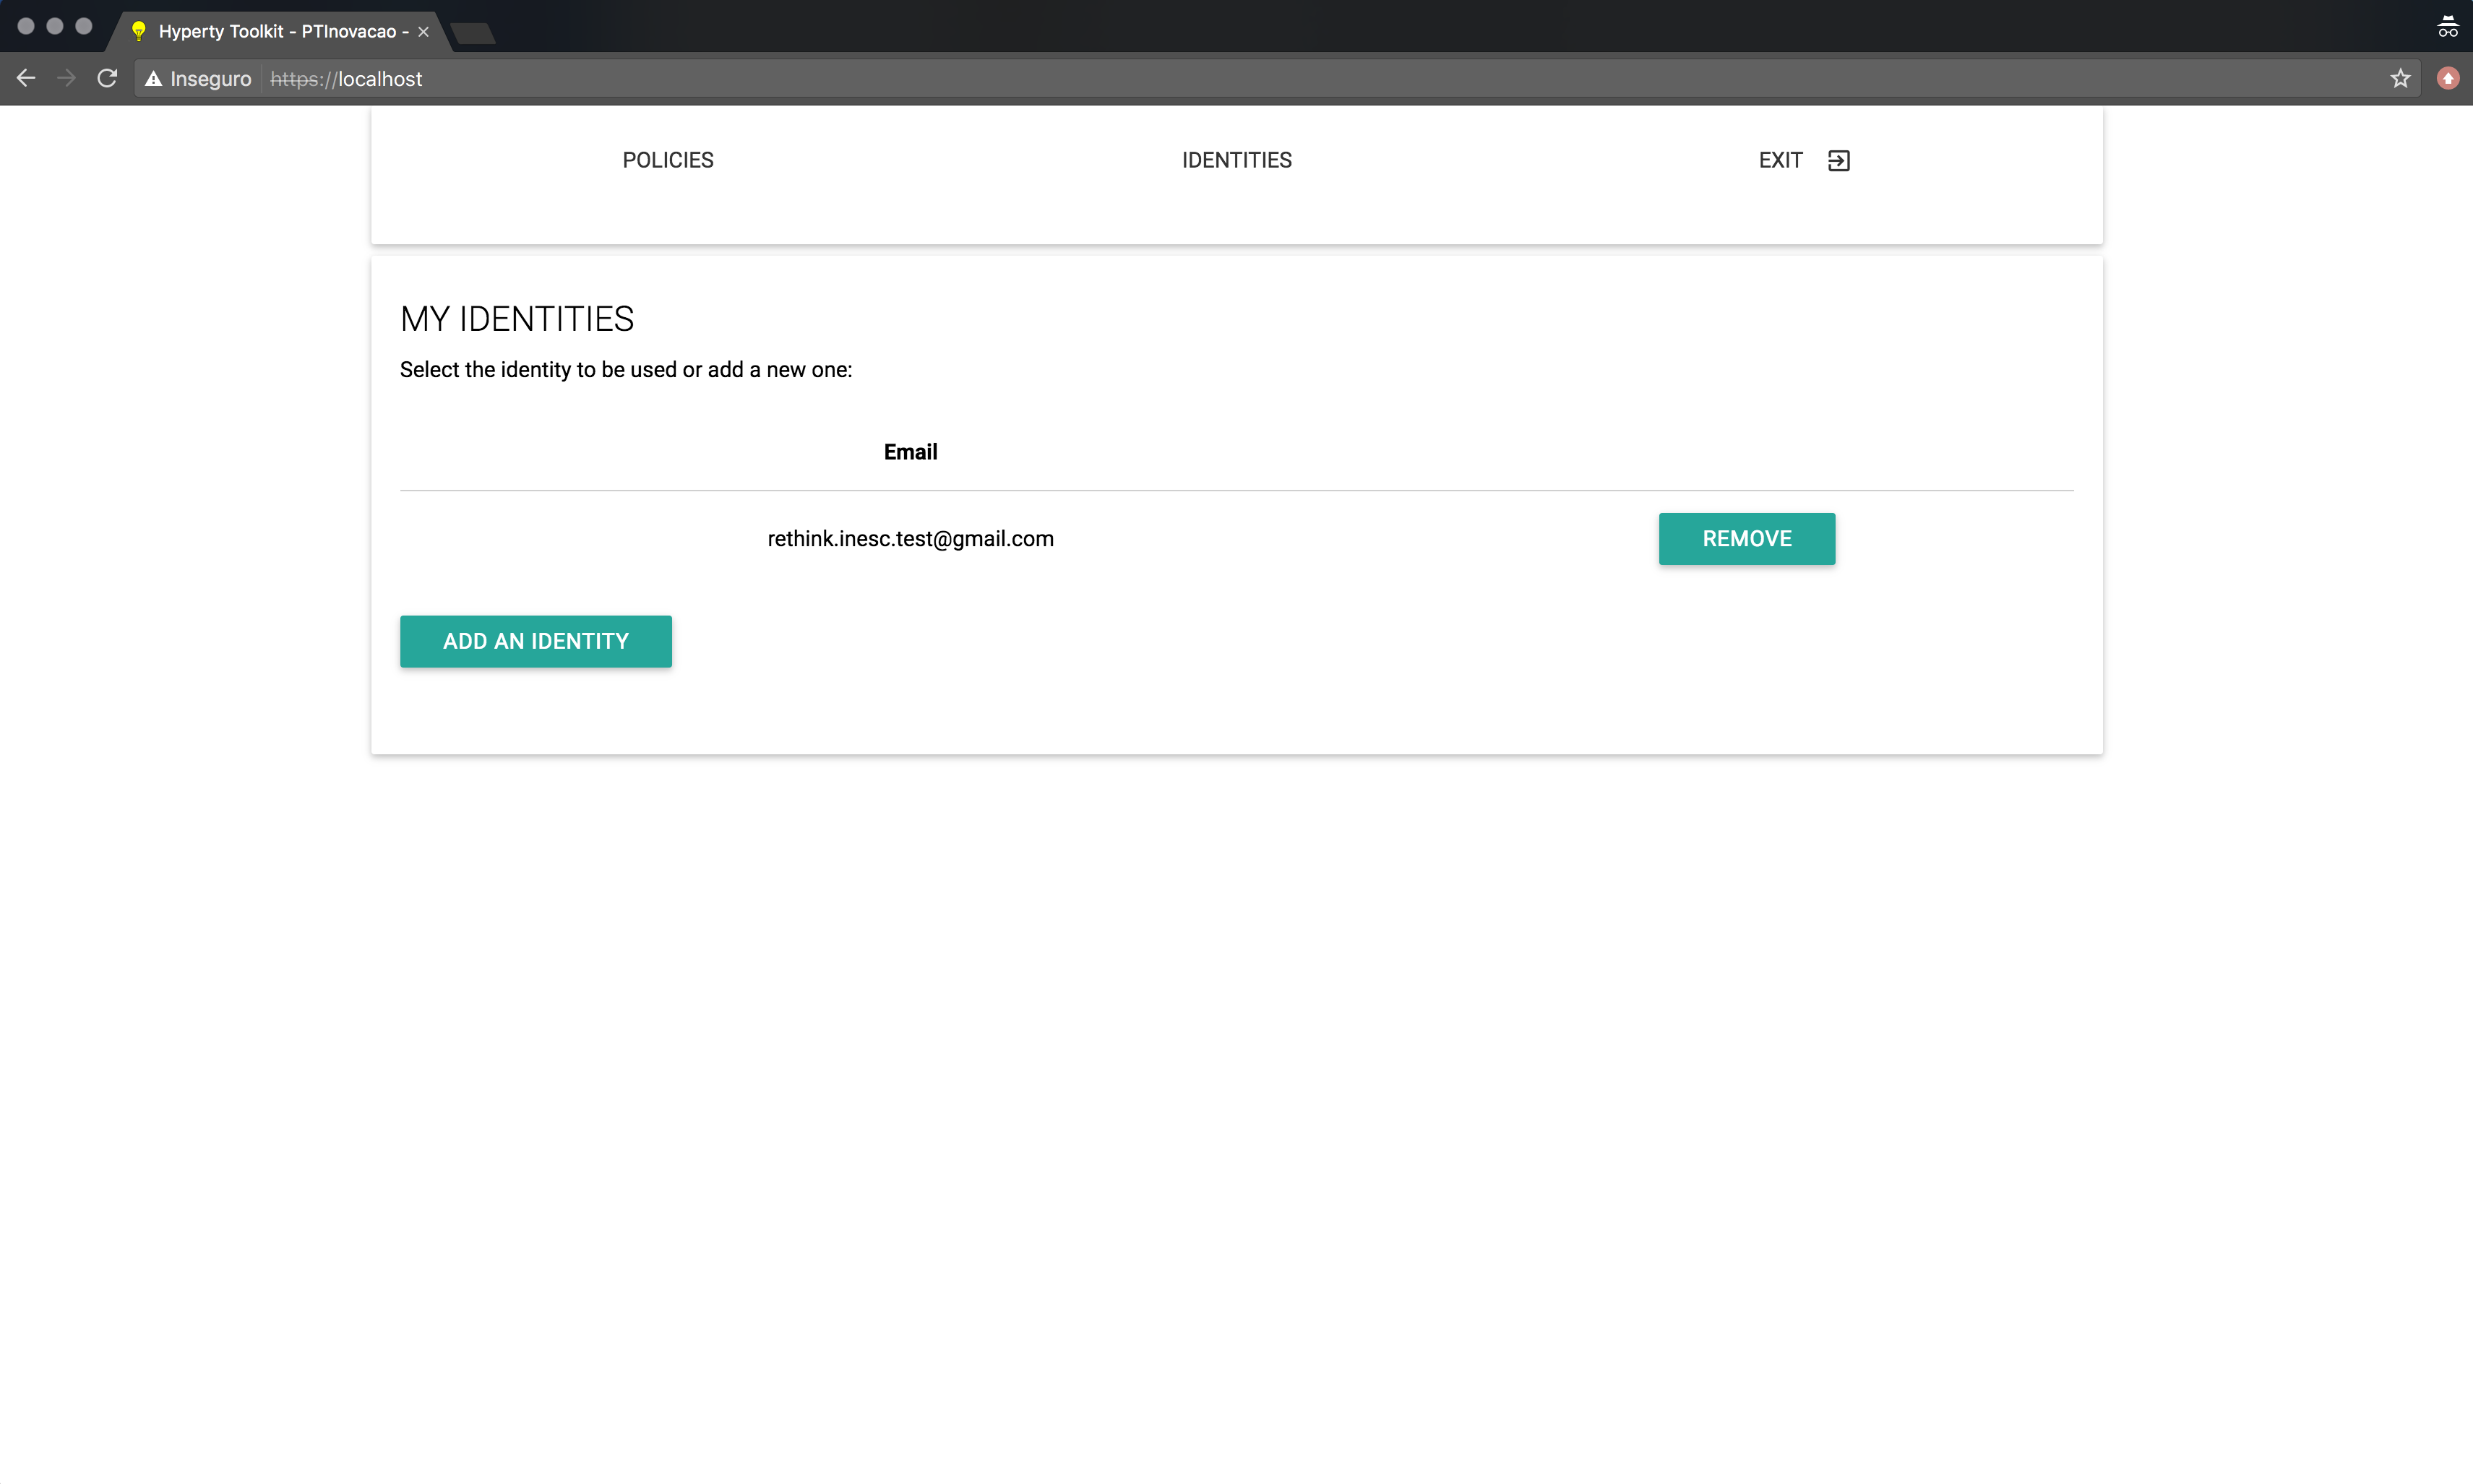
This page, containing the list of authenticated identities, also becomes accessible by selecting the Identity GUI, as is described in the Identity Selection section, after adding at least one identity.
Browser Extension Functional Testing Procedures
Step one: go to the application home page and click the “Connect” button.

Step two: The Firefox extension that is managing ID Cards in the browser appears and proposes the identities formerly registered:

Step 3: If the user clicks on the identity and he is not yet authenticated, it is redirected on the IdPProvier:

Step 4: The user is automatically logged in the service. Note that if he as already authenticated, the Step 3 is skipped.

Non functional Evaluation
The non-functional evaluation of the IdModule is presented in IDModule Evaluation.